Making QSTs and spinning seams
You might be here because you’ve clicked on the link in my pattern, Starshadow. That pattern calls for making quarter-square triangles (QSTs), and there’s a direction that says you can either press your seams open or spin the seam. Let me explain!
We’ll start with QSTs, the friendly cousin of HSTs (half-square triangles). It’s pretty straightforward: You use two HSTs to make two QSTs. Like this:

If you’re coming to this blog post from the Starshadow pattern, you’ve already seen this graphic, because it’s in the pattern. Let’s throw in some photographs and tips to supplement the graphic (if you’re only here to learn how to spin a seam, you can scroll down further):

Place (2) HSTs right sides together, opposite colors on opposite sides. Two options: You can either draw one line down the center as in the graphic and sew on either side of it; or you can draw two lines ½" apart marking the sewing lines exactly as in the photograph (I use a special, tiny cute ruler to do this).

This picture just shows you how, if you’ve pressed your seams in opposite directions (I pressed them both towards the blue), they’ll nest.

Tip:
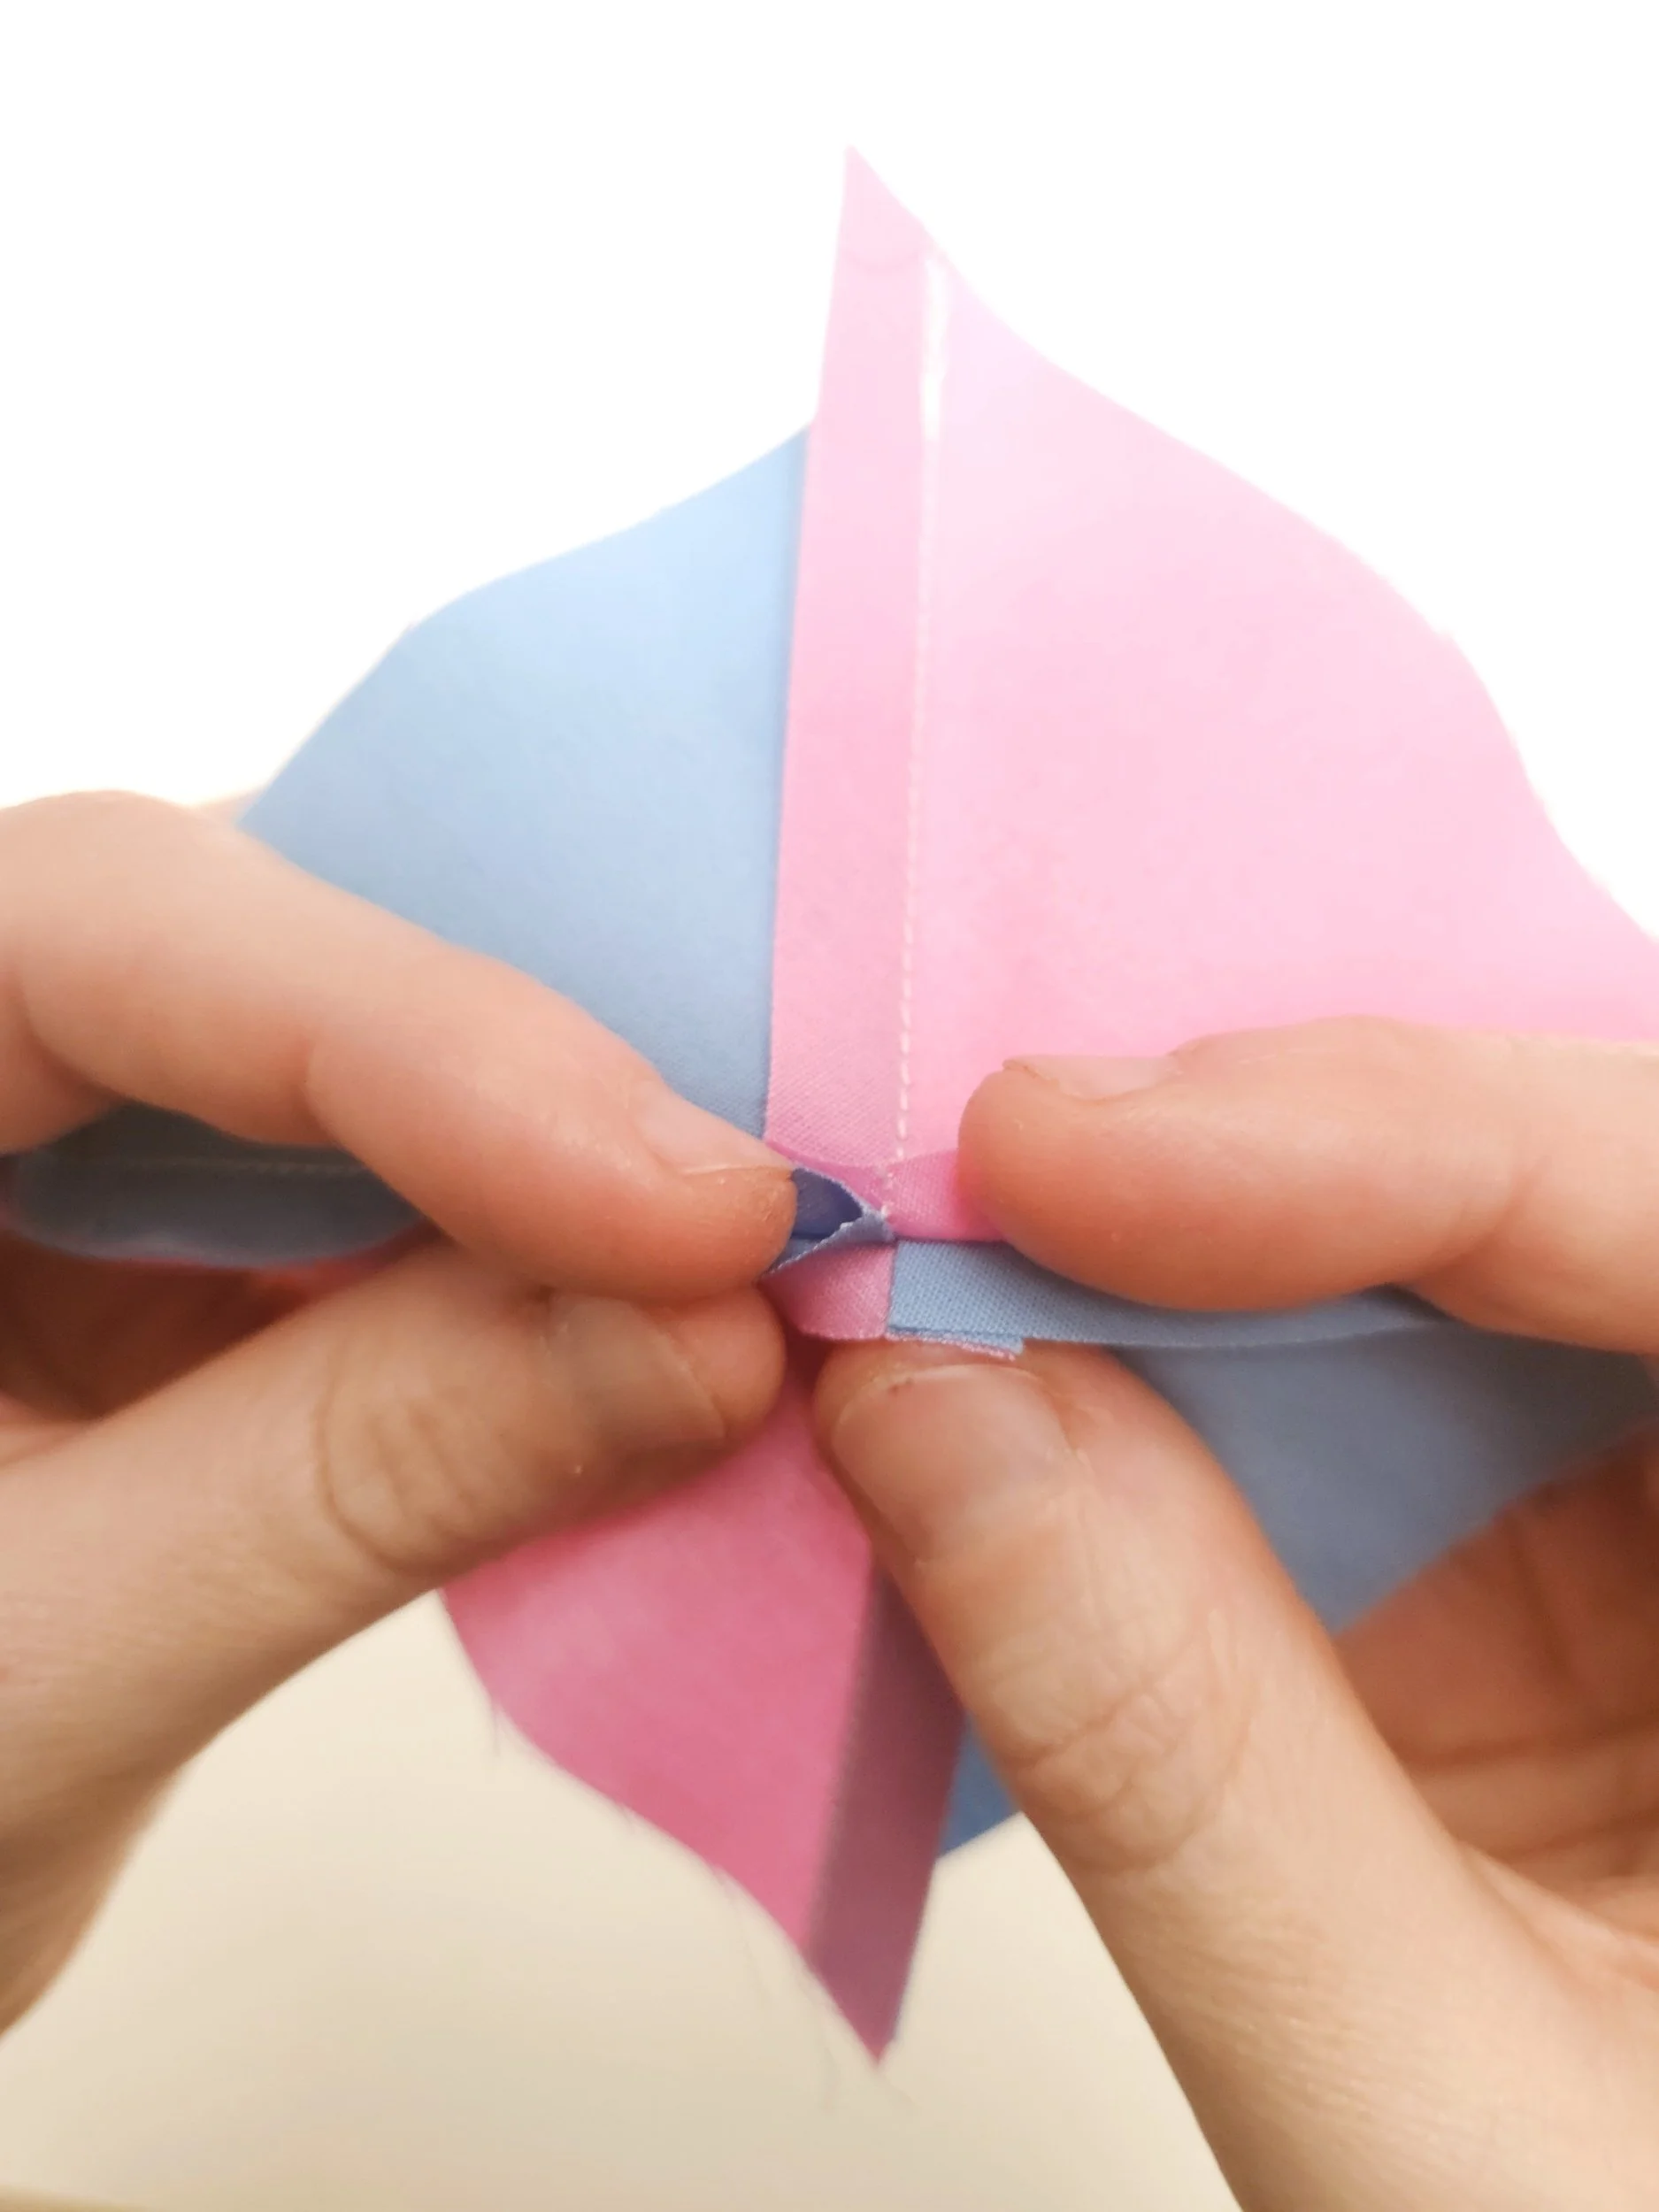
Here’s how I clip my QSTs. I don’t use pins. I don’t add pins to the center; nested seams should be enough to help those seams line up. Bonus tip: Put it through your sewing machine with the top seam’s edge going first. If your presser foot pushes the top layer of fabric back towards you (like it tends to do), it’ll just push against the nested seam on the bottom and nothing will end up moving out of place.

Before I do anything else, at this point, I check to see that the seams lined up.

After you cut between the sewn lines, this is what your seam will look like on your QST before pressing. If you pressed the seam open, it’d look pretty much like this. But let’s spin it.
I feel like the pictures are pretty self-explanatory here, but basically you can see how I pull the blue fabric away from the pink fabric first on one side…

…so that it looks like this…

and then on the other side…

…and I use my seam ripper to help along any resisting threads.

So then you just press it and end up with this cute little configuration. Look how the seams are all going in the same direction! Wow! Kazow!
So besides resulting in really fun looking seams, which no one will ever see because they’re on the inside of your quilt, why would we bother? Well, it helps manage bulk. If you’ve ever had to deal with bulky seams while quilting (skipped stitches, anyone?), you know that’s important. And if you want to nest your seams to get perfectly matched seams, managing bulk can become an issue. And when you spin a seam, that seam lies so flat.
And it’s just so satisfying. Yum.